Make sure you’re using a good USB 3.0 cable and have it plugged into a USB 3.0 port on the PC
Never use a USB hub or a port on the PC that is shared with another used port.
Make sure you’re using the latest version of our software compatible with your scanner
We are improving our software and this can positively affect performance, so make sure you are up-to-date. See the Software page for reference.
Close other applications and use the computer for scanning only
It is advised to close every program on the computer when doing a scan and leaving the full processing power to the capture. Also make sure no disk reading-writing operation is going on in the background, like files copies.
Never plug a USB device while scanning, as this may cause communication issues on the USB ports and will probably cause a lag and dropped frames.
Install dedicated SSD Capture card
We have tested many SSD’s to capture video. We only recommend the following m.2 disks:
- SSD’s from HP
- Samsung 970 plus 1TB or 2TB
- Samsung 980 Pro series 1TB or 2TB
- Samsung 990 Pro series 1TB, 2TB or 4TB
- Transcend MTE250H 4TB
These m.2 SSD disks perform best under constant capture conditions. The card should be used for capturing only. Do not install the OS or any other software to this drive.
Best connection is via a m.2 slot. If your motherboard does not have an m.2 slot, you can use one of the PCIe slots.
There are very cheap PCIe to m.2 adapters. You can see an example of this adapter in the video below. Just search on google for PCIe to m.2 and you will find what you need.
https://www.youtube.com/watch?v=L9ENVGa2e50
This is the easiest fix to improve capture speeds.
Improve speed of conventional hard disks
Please remind that we do not recommend to use conventional hard disks as capture disks.
If you turn off the Windows search index feature on your hard drives, you can get better performance on Windows 10.
In windows explorer, go to the hard disk you would like to disable the index features. This will probably be the drives you use to capture your films.
Next, right click a drive and click Properties
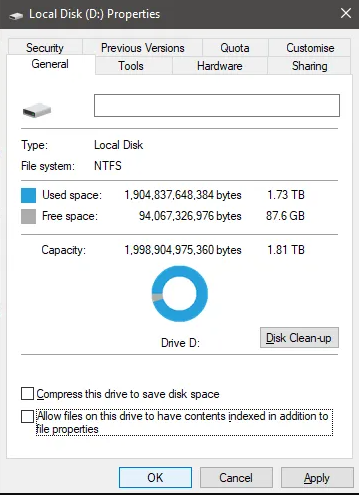
On the General tab, click to uncheck Allow files on this drive to have contents indexed in addition to file properties at the bottom. After, click Apply.
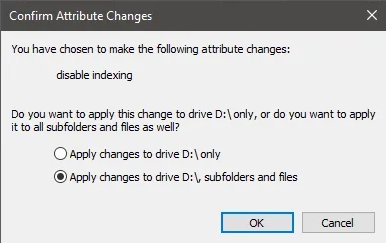
You will be given the option to choose all files or just the drive itself. Make sure to select Apply changes to Drive X:, subfolders and files. After, click OK.
The next step will take some time. Your PC will now apply this new attribute to every file on that drive. Thankfully, you can let it run in the background and it shouldn’t have a huge impact on your performance, unless you’re applying it to the drive you are using Windows on.
If any Access Denied messages appear, just click Ignore All – these are system files or other files that are currently being used.